
Terraform is an open-source Infrastructure as Code (IaC) tool that allows users to define, provision, and manage cloud infrastructure resources in a declarative way. It supports various cloud providers such as AWS, Azure, Google Cloud, and more, and uses a domain-specific language (DSL) called HashiCorp Configuration Language (HCL) for defining configuration files.
When you use Terraform to create infrastructure, it generates a “state file” which is a JSON file containing information about the resources, their configurations, and their current states, such as their IDs, IP addresses, and other metadata. Terraform reads this file to determine the current state of the infrastructure and modify it accordingly based on the configurations provided.
One of the main concerns when using Terraform is deciding where to store the state file and how to provide access to it for other team members when collaborating on maintaining infrastructure. One best practice is to define a remote state to store the file in a remote storage account with proper access control. However, as the number of deployments grows, this can become an overhead in maintaining the infrastructure.
Terraform Cloud (TFC) is an enterprise-level managed service offered by HashiCorp that helps eliminate the overhead of managing state files and provides a robust platform for maintaining infrastructure. TFC provides a centralized platform for storing and sharing Terraform configuration files and enables real-time collaboration with team members. As a new user of TFC, this guide will provide you with a simple overview of how to use it effectively.
In this guide, we will use TFC to deploy a simple web server on AWS from scratch. The deployment will include several resources, all deployed via Terraform Cloud;
- Virtual Private Cloud (VPC)
- Subnet
- Internet Gateway
- Route Table
- Route Table Entry
- Route Table Association
- Key Pair
- EC2 Instance
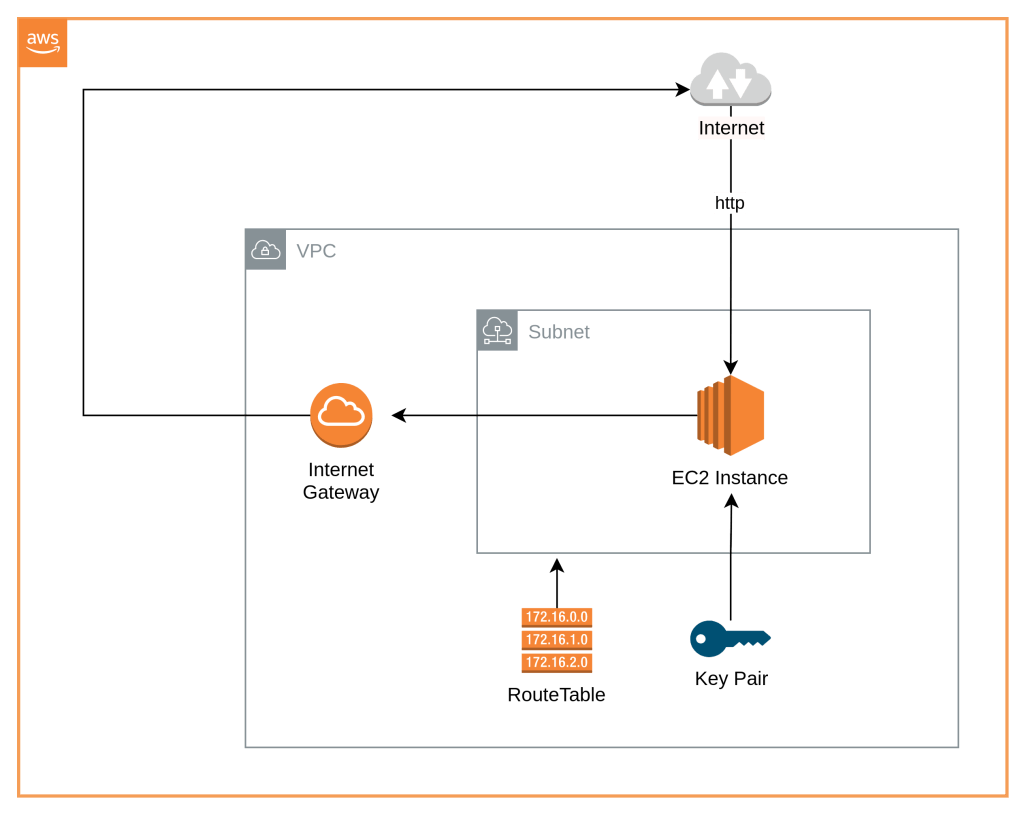
The infrastructure is predefined in HCL in this repository, and we will be using this as our version control system for this guide.
Step 01: Sign up for Terraform Cloud
To begin using Terraform Cloud, you must first sign up for an account. To do this, go to the Terraform Cloud website and click the “Sign Up” button. You will be prompted to enter your email address and create a secure password. After completing the registration process, you will be redirected to the Terraform Cloud dashboard where you can start managing your infrastructure.
Step 02: Create a new organization
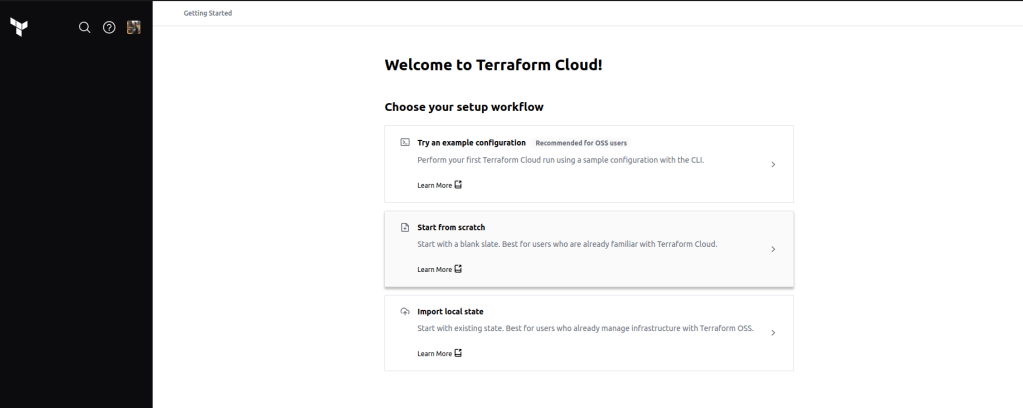
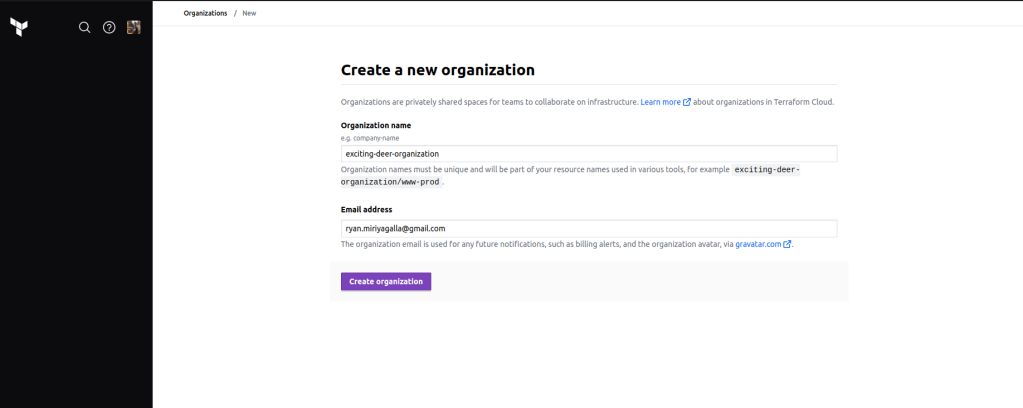
The next step is to select the option to start from scratch. However, before proceeding, you need to create an organization in Terraform Cloud. A Terraform Cloud organization is a logical grouping of users, workspaces, and resources within the Terraform Cloud environment. To create an organization, you will be prompted to enter a name for it. Once you have completed this step, your organization will be created, and you can proceed to the next step.
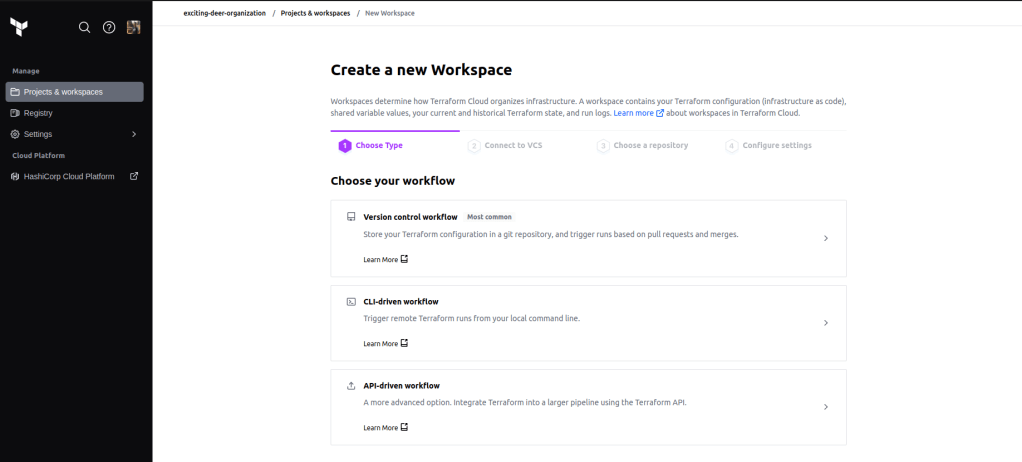
Step 03: Create a new workspace
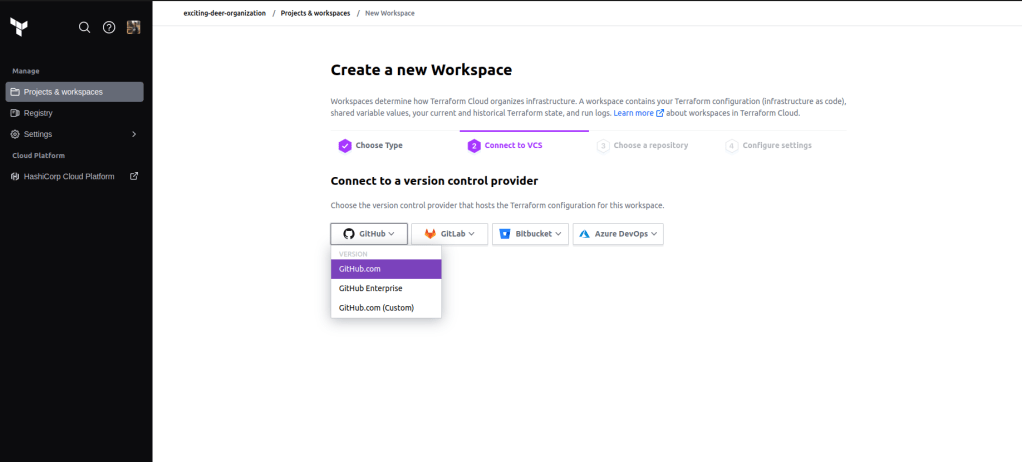
Workspaces in Terraform Cloud are used for managing infrastructure code. To create a new workspace, you can navigate to the dashboard of your organization and select the “New Workspace” button, followed by choosing the “Version control driven workflow” option. Upon selecting this option, you will be prompted to select a version control system (VCS) and connect it to your Terraform Cloud account. For this workspace, we will be using Github as our VCS and selecting the repository that contains the Terraform code.
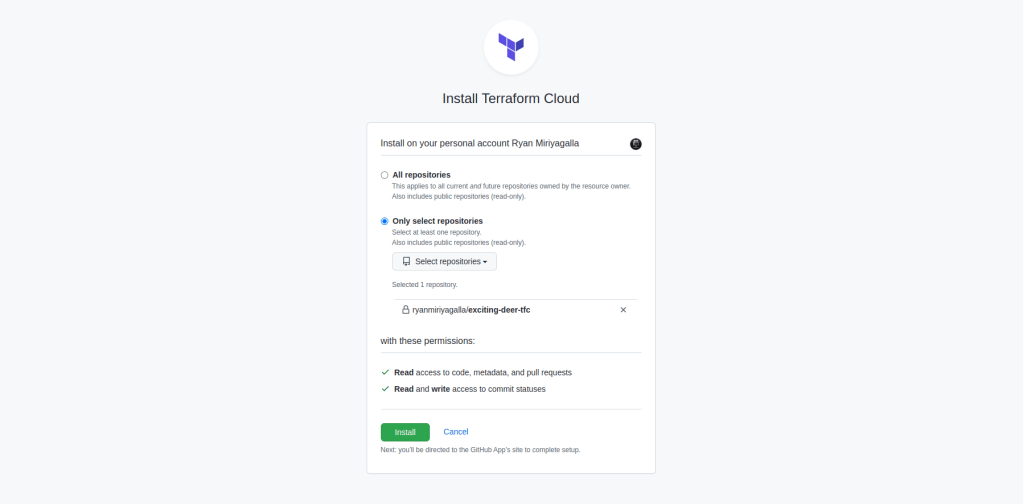

After selecting the repository and connecting the VCS with Terraform Cloud, you can specify a name for our workspace and then click the ‘create workspace’ button to create it. Following this, additional configuration can be performed within the workspace to customize it according to your specific requirements.
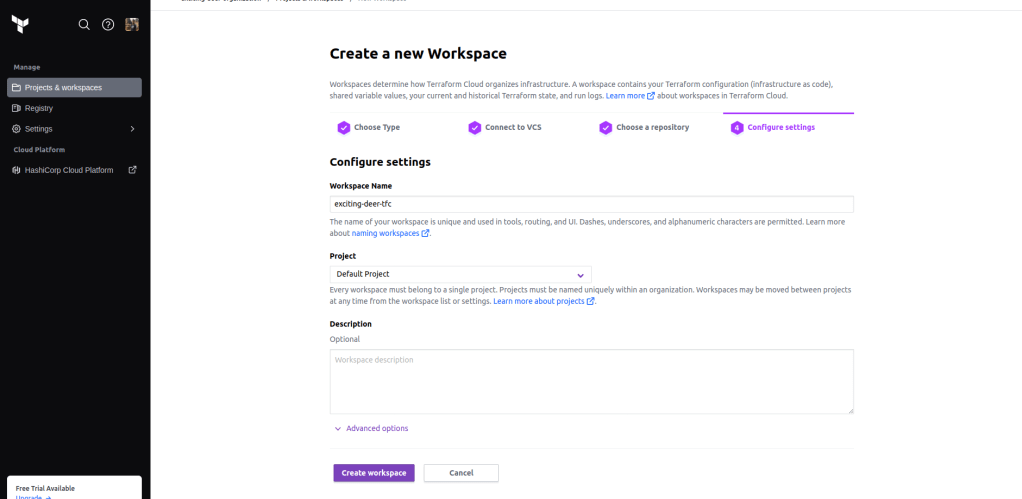
Step 04: Configure your workspace
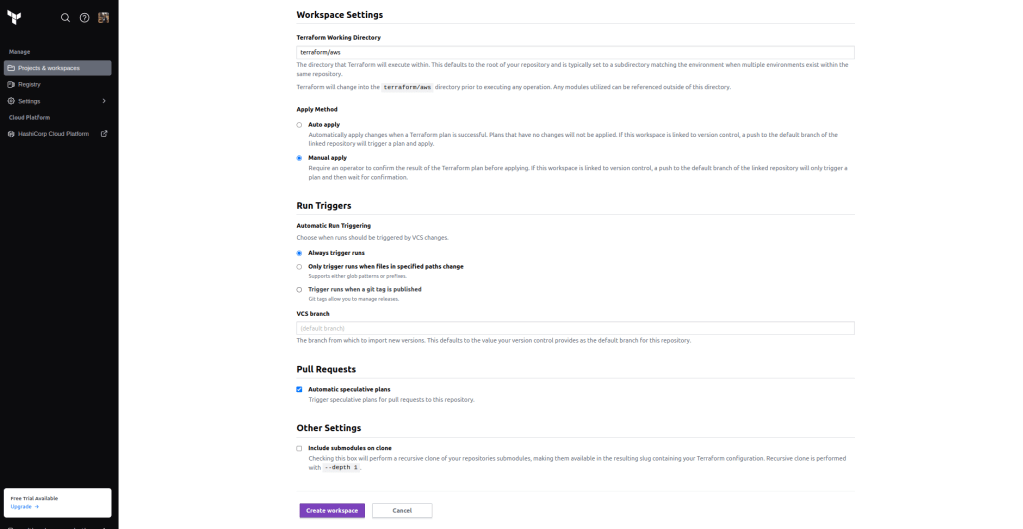
After creating a new workspace, the next step involves configuring it with your infrastructure code. To achieve this, you can navigate to the workspace dashboard and select the “Settings” tab. In this tab, you can set up the VCS provider, configure the Terraform version, and establish the environment variables for the workspace. For this guide, we will focus on configuring some of the critical settings required, which include:
- Terraform Working Directory
- VCS Branch
Terraform Working Directory
The working directory is the directory where the main.tf file is located within the repository connected to your workspace. In this guide, the infrastructure code is located in the directory “./terraform/aws” within the repository. Therefore, this path is specified as the working directory.
VCS Branch
This refers to the branch within the repository where your code is stored. For this guide, we will leave it at the default value, which selects the default branch of the repository by default.
Step 05: Set variables
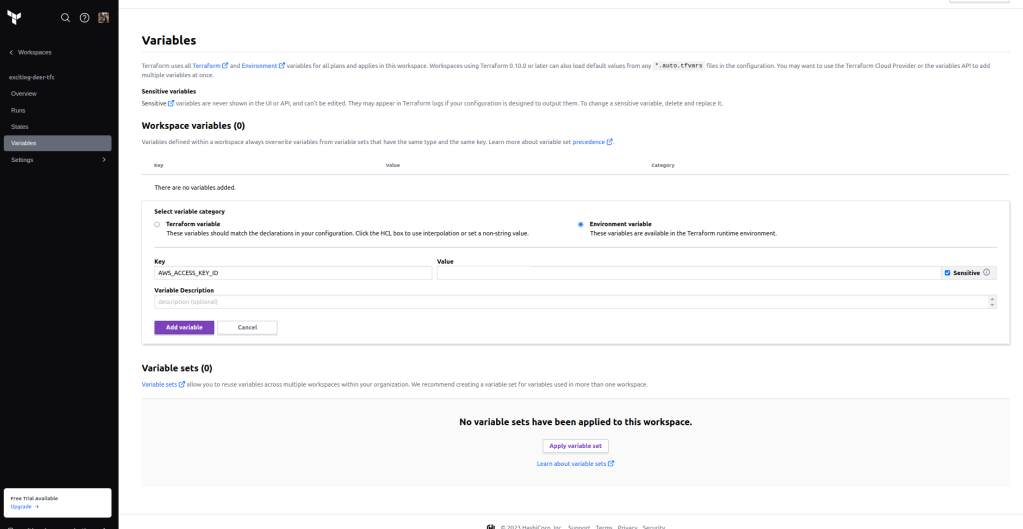
This step is crucial for authenticating Terraform Cloud (TFC) with our cloud provider, AWS. When running Terraform locally, a recommended best practice for authenticating Terraform with AWS is to export the AWS_ACCESS_KEY_ID and AWS_SECRET_ACCESS_KEY of an IAM user created to run Terraform. A similar approach can be taken with TFC to authenticate it with AWS. This involves setting environment variables within the workspace as sensitive values so that they can be referenced during execution and the workspace can be successfully authenticated with AWS.
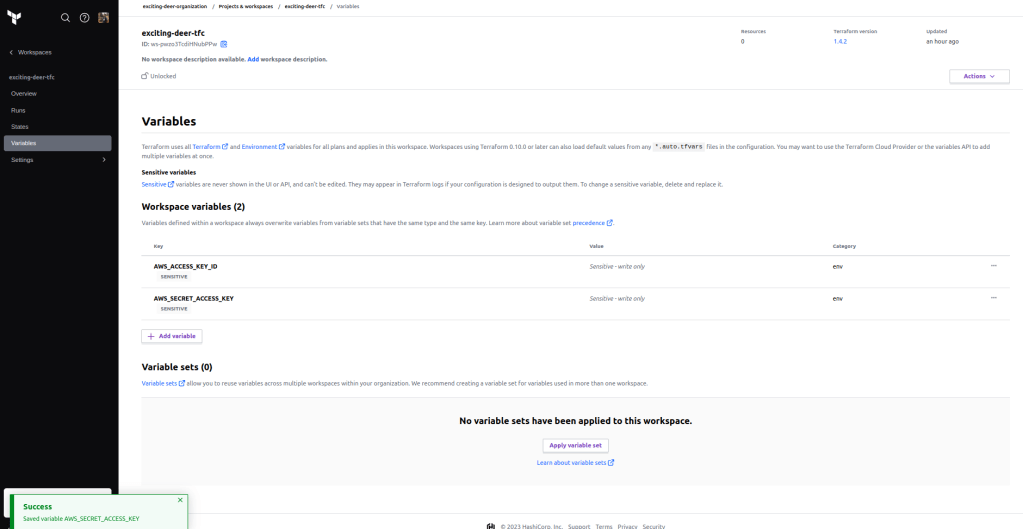
To achieve this, navigate to the workspace dashboard and select the “Variables” button. This will prompt you to add new variables and specify whether it is a Terraform variable or an environment variable. Select “environment variable” and add your values to AWS_ACCESS_KEY_ID and AWS_SECRET_ACCESS_KEY. You can make these variables encrypted by selecting the sensitive option during or after creating the variables.
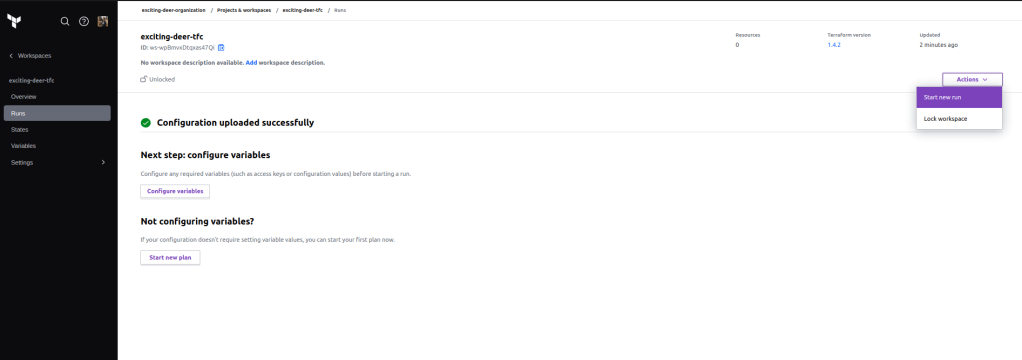
Step 06: Run Terraform and provision the infrastructure
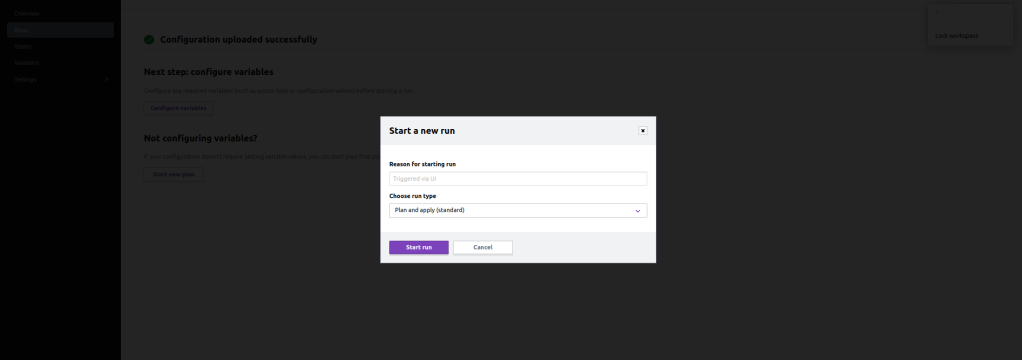
Now that you have configured our workspace and the required environment variables, you can proceed with running our first Terraform job to create our infrastructure. To achieve this, navigate to the workspace dashboard and select the “Run” button. This will prompt you to choose between two options – “plan” or “apply”. Once you have made your selection, Terraform Cloud will automatically execute your Terraform code and present the results in the console.
For this guide, we will select “plan and apply” to generate the plan, review it, and then confirm the run to create our infrastructure.
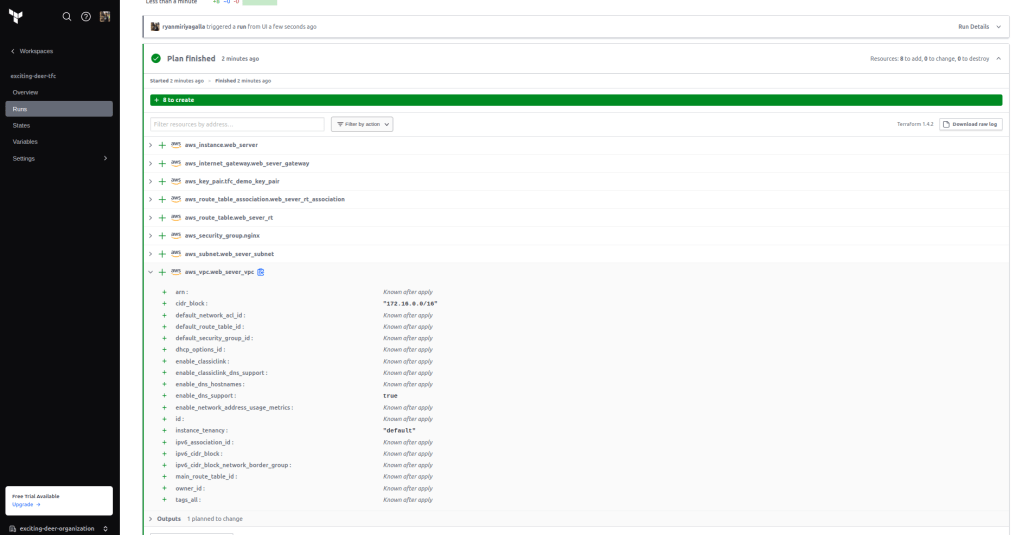
The first step involves initializing Terraform (with a remote backend managed by TFC), followed by generating the Terraform plan. Once the plan is generated, you can view the resources that will be created along with their relevant information.
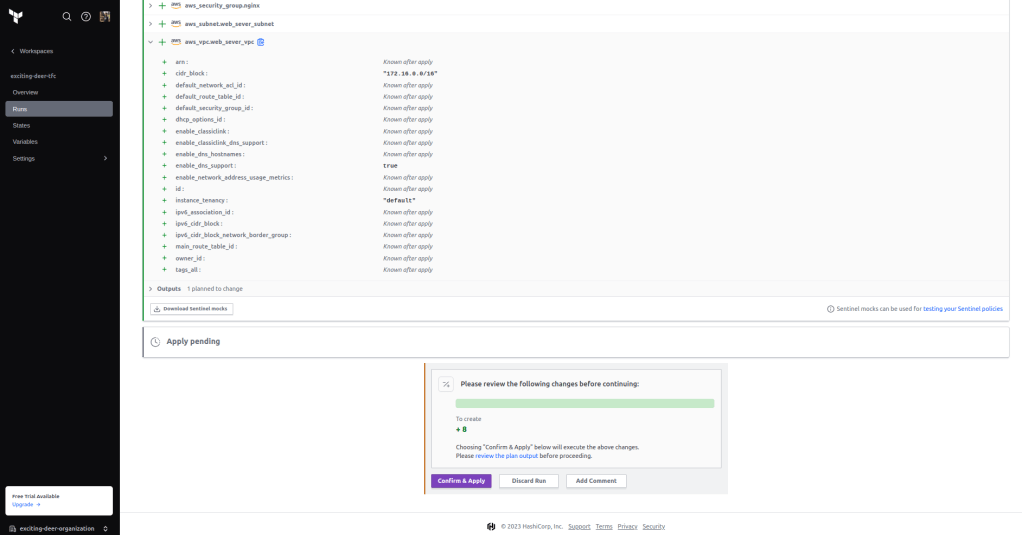
Once you have reviewed the generated plan, you can proceed by selecting the “Confirm and Apply” button to initiate the creation of your infrastructure.
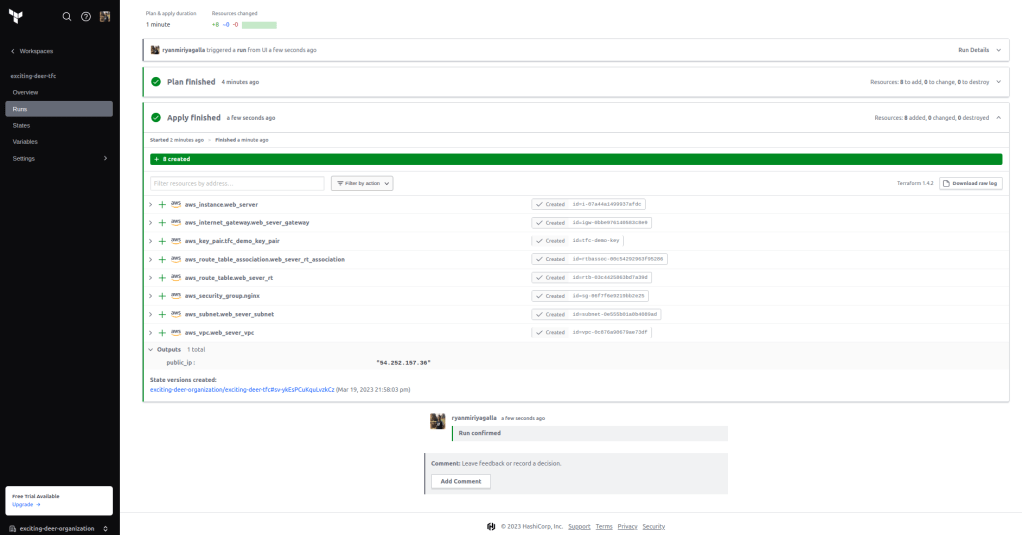
After the Terraform application process has finished, you will be able to view the status of your infrastructure on the console. Additionally, you can access your newly provisioned infrastructure on your AWS dashboard.
Now that you have successfully created our infrastructure with TFC, you can choose to view or download our state files or even destroy your infrastructure using the TFC console itself.
To view your state file, you can navigate to the workspace dashboard and select the “State” button.

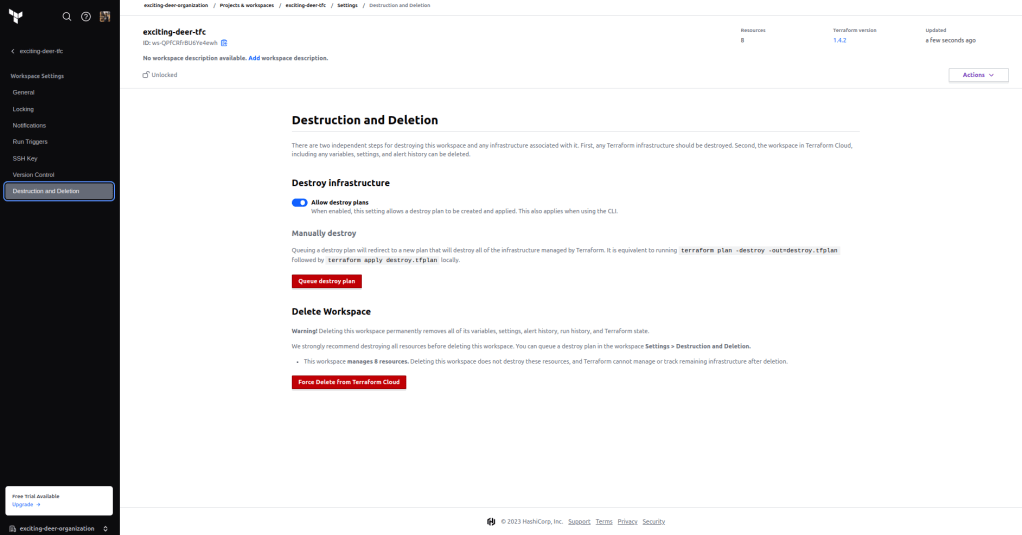
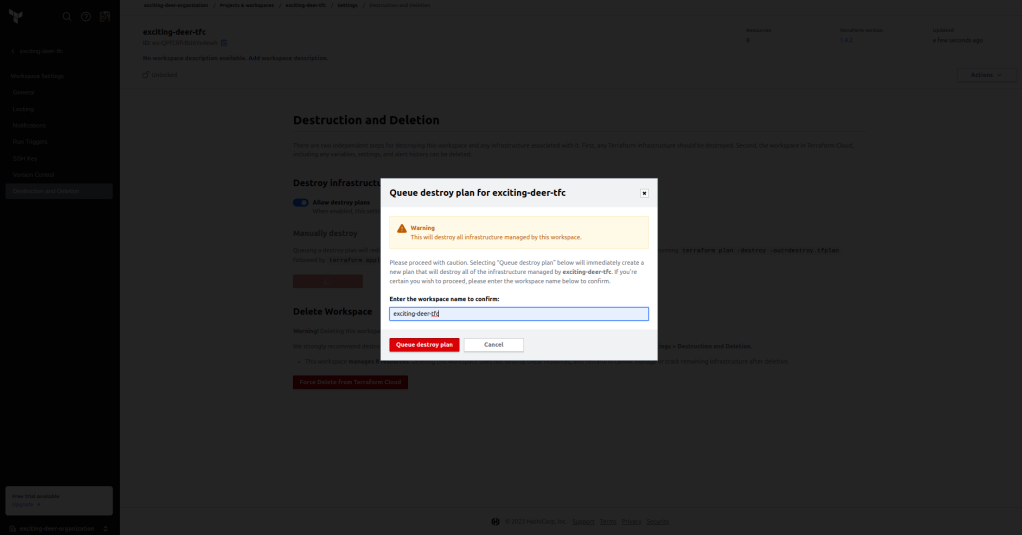
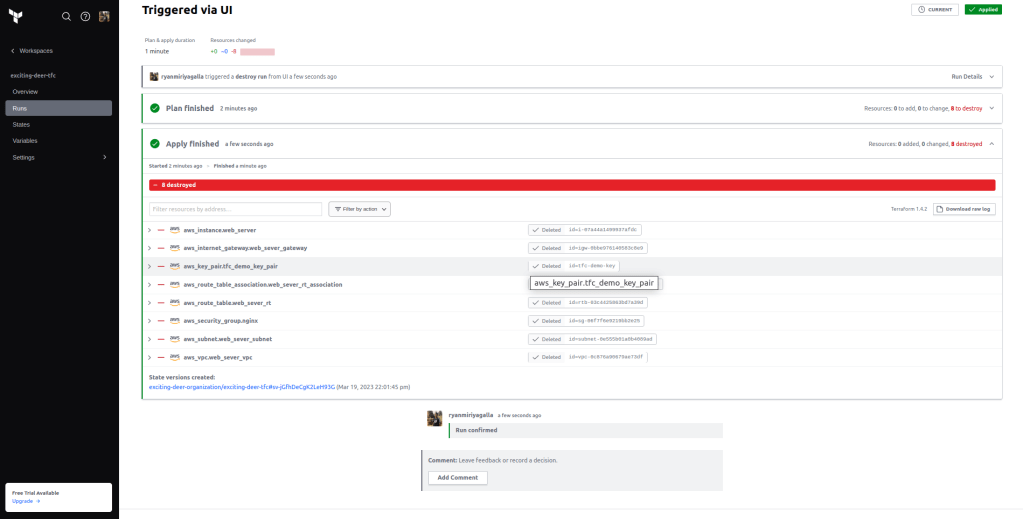
To destroy the infrastructure, you can navigate to the workspace dashboard and click on the “Settings” button, followed by “Destruction and Deletion”. This will trigger a TFC run to generate a destruction plan, which can then be applied to destroy the existing infrastructure.
In conclusion, Terraform Cloud is a powerful tool for managing infrastructure as code. With its centralized platform and simplified features, it is an essential tool for any team that is serious about managing its infrastructure efficiently. By following the steps outlined in this guide, I hope you can quickly and easily get started with Terraform Cloud, and begin building your infrastructure with confidence.

Leave a comment